A wood kitchen island with seating can completely transform your kitchen. It is more than just a workspace; it becomes the heart of your home where family gathers, meals are enjoyed, and conversations flow. Building a wood kitchen island with seating yourself may seem challenging, but with careful planning and the right approach, it can be a fun and rewarding project. In this guide, we’ll walk through every step—from planning and choosing materials to construction, finishing, and creating a functional seating area.
Why a Wood Kitchen Island with Seating is a Great Idea
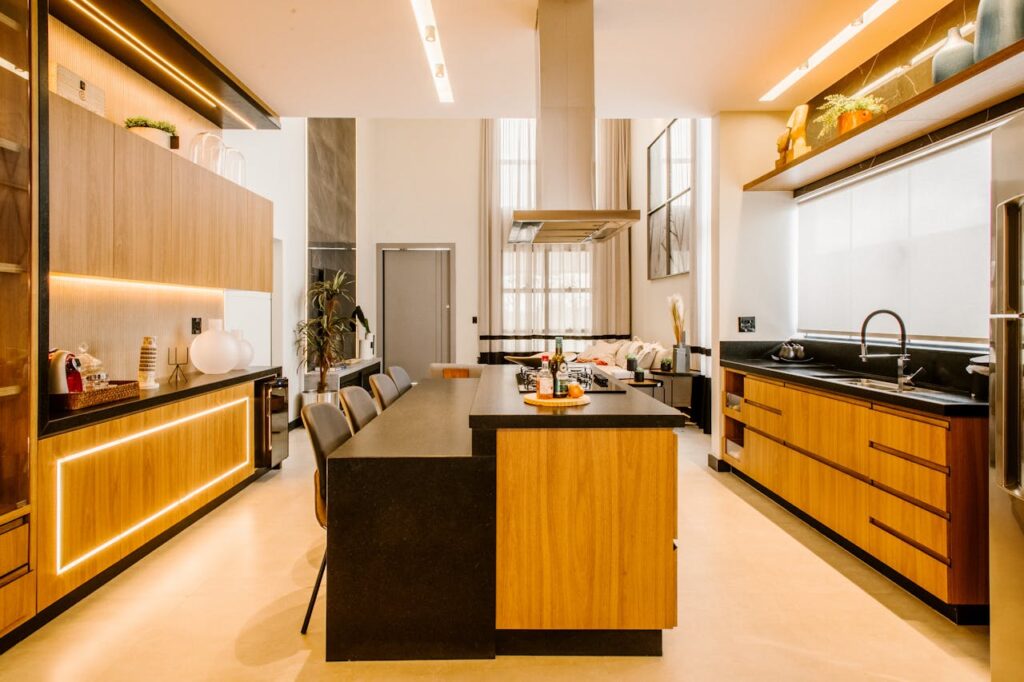
When you decide to build a wood kitchen island with seating yourself, you are investing in both style and practicality. A kitchen island with seating provides a social hub, allowing family members to interact while meals are prepared. Wood is a versatile material that adds warmth and charm to any kitchen, whether your style is modern, rustic, or farmhouse-inspired. With the right design, your island can also offer extra storage, a prep area, and a place for casual dining—all in one elegant piece.
Planning Your Kitchen Island Project
Before starting, it’s essential to plan carefully. Measure your kitchen space to ensure enough room for walking around the island and accommodate seating. Decide how many people will use the island daily and select the ideal countertop height. Standard kitchen islands are around 36 inches tall, but if you want bar-height seating, a taller surface is better.
Choosing the right wood is also critical. Hardwoods such as oak, maple, and cherry are strong and durable, perfect for a long-lasting kitchen island. For a more budget-friendly option, plywood with a solid wood veneer can work, though it may require more care. Planning properly ensures that your wood kitchen island with seating will be both functional and visually appealing.
Gathering Materials and Tools
To build a wood kitchen island with seating yourself, gather all necessary materials and tools in advance. You’ll need wood planks for the frame and countertop, screws, wood glue, clamps, a drill, saw, sandpaper, measuring tape, and optional items like wood stain or polyurethane. If you plan to add decorative elements like molding or trim, include those materials as well. Having everything ready will make construction smoother and more efficient.
Constructing the Frame
The frame is the foundation of your wood kitchen island with seating. Start by cutting your wood according to your measurements, ensuring precision. Assemble the base using screws and wood glue, making sure each corner is square. Frequent level checks are important to avoid a crooked island. Cross beams can be added for extra support, especially if the island will hold heavy items or double as a seating area. Taking your time here ensures a strong, durable structure.
Adding Storage Options
One major advantage of a wood kitchen island with seating is the ability to incorporate storage. Cabinets, drawers, and open shelves can all be included under the countertop. This allows you to store cookware, utensils, or pantry items conveniently within reach. You can also integrate specialty compartments like wine racks or pull-out bins. Properly designed storage makes the kitchen island not only attractive but also highly functional.
Installing the Countertop
The countertop is the centerpiece of your wood kitchen island with seating. Choose a material that fits your kitchen style, such as a solid wood slab, butcher block, or engineered wood. Secure the countertop to the frame using screws from underneath, ensuring a smooth surface. Sand thoroughly to remove rough edges and finish with a stain or polyurethane for durability. A well-finished countertop will resist scratches and spills while maintaining a warm, natural look.
Creating a Comfortable Seating Area
The seating area is what transforms a regular island into a wood kitchen island with seating. Decide if you want an overhang to accommodate stools or chairs. Make sure there is enough legroom so everyone sits comfortably. Backless stools save space and give a sleek look, while cushioned chairs offer more comfort. Arrange the seating evenly to maintain balance and functionality. A well-thought-out seating area encourages family gatherings and casual dining.
Finishing Touches and Care
After construction, finishing touches make a difference. Sand all surfaces, apply stain or paint, and seal with a polyurethane finish to protect the wood. Regular cleaning with a soft cloth and mild soap will maintain its beauty. Avoid harsh chemicals and reapply a protective finish as needed. Proper care ensures that your wood kitchen island with seating remains functional and stylish for years.
Conclusion
Building a wood kitchen island with seating yourself is a rewarding project that combines creativity, functionality, and style. From careful planning and wood selection to constructing the frame, adding storage, installing a countertop, and designing a seating area, each step adds value to your kitchen. With patience and attention to detail, you can create a custom island that is not only a workspace but also a gathering spot for family and friends. Your kitchen will become more organized, inviting, and beautiful with this DIY project.