You want a bathroom that looks great, works well, and holds its value — and the contractor you choose makes that happen. Pick a licensed, experienced renovation contractor who handles design, plumbing, electrical, tiling, and permits; that single choice will save time, prevent costly mistakes, and protect your investment.
This post walks you through how to evaluate contractors, compare quotes, and plan a renovation that stays on schedule and on budget. Expect practical tips on spotting qualified pros, managing the work sequence, and making material and layout decisions that fit your goals.
Choosing the Right Bathroom Renovations Contractors
Check for proper licensing, insured workers, and a proven track record when hiring bathroom renovations contractors. Focus on specific credentials, past projects similar to your scope, and direct feedback from previous clients to ensure quality results and reliable service.
Credentials and Certification
Verify the contractor holds a valid state or local license for plumbing, electrical, or general contracting as required by your jurisdiction. Ask for the license number and confirm it on the issuing agency’s website.
Confirm they carry general liability insurance and workers’ compensation; request certificates of insurance and note policy limits and effective dates. This protects you from liability if a worker is injured or property is damaged.
Look for manufacturer or trade certifications for tile, waterproofing, or fixture installation (e.g., Schluter, Kohler, or local trade associations). Those certifications signal training on specific systems you might use. Keep written proof of all credentials in your project file.
Experience and Portfolio
Request a portfolio of completed bathrooms that match your size, style, and complexity—e.g., master bath with shower pan replacement, ADA conversions, or luxury wet rooms. Examine photos for quality of tile layout, grout work, caulking, and trim details.
Ask how many projects of your scope they complete each year and the typical project timeline. Contractors who routinely handle similar jobs will foresee common issues like hidden plumbing or subfloor repairs.
Visit at least one recent job in person if possible, or review multiple start-to-finish photo sets. Note consistency in finishes and whether subcontractors (plumbers, electricians) are in-house or hired per job. In-house teams often reduce coordination delays.
Client Reviews and References
Read online reviews across multiple platforms (Google, Yelp, Better Business Bureau) and look for recurring themes: punctuality, budget accuracy, cleanup, and communication. Treat a single negative review as context; patterns matter more than isolated complaints.
Ask the contractor for three recent references and contact them with specific questions: Was the final cost within the original estimate? Were change orders clearly documented? How well did the crew protect surrounding areas and keep a clean worksite?
When you visit references’ completed bathrooms, inspect grout joints, caulk lines, fixture operation, and test drains for slow flow. Confirm the contractor honored warranties and responded to post-completion issues promptly.
Planning and Executing a Successful Bathroom Renovation
Decide clear goals, set a realistic budget, and pick materials that match your timeline and maintenance tolerance. Prioritize plumbing, layout changes, and durable finishes before selecting decorative fixtures.
Initial Consultation and Needs Assessment
Start by listing non-negotiables: shower vs tub, number of sinks, ventilation, and accessibility features like grab bars or curbless entry. Measure the room and note existing plumbing locations; moving drains or supply lines adds significant cost and time.
Bring photos, inspiration, and a rough budget to the contractor meeting. Ask the contractor for references, proof of license and insurance, and examples of similar jobs. Request a written scope that states demolition limits, structural work, electrical/plumbing responsibilities, and who handles permits.
Clarify who orders long-lead items such as custom vanities, tiles, or specialty fixtures. Set expectations for daily site cleanup, dust control, and where materials will be stored. Confirm communication cadence — weekly progress calls or app updates — and how change orders will be priced and approved.
Project Timeline and Budgeting
Break the project into phases: demo, rough plumbing/electrical, structural/framing, insulation/drywall, finishes, and final inspection. Ask the contractor for a Gantt-style schedule with target start and finish dates for each phase and milestones tied to payments.
Allocate contingency of 10–20% for unforeseen issues like hidden water damage or outdated wiring. Get at least three written estimates that list labor, materials, permit fees, and disposal costs. Compare line items, not just the total price.
Tie payments to milestones rather than dates. Verify permit responsibilities and inspection points to avoid hold-ups. If you need the bathroom for daily use, plan alternate arrangements and discuss fast-track options for critical path items like waterproofing and tile.
Design and Materials Selection
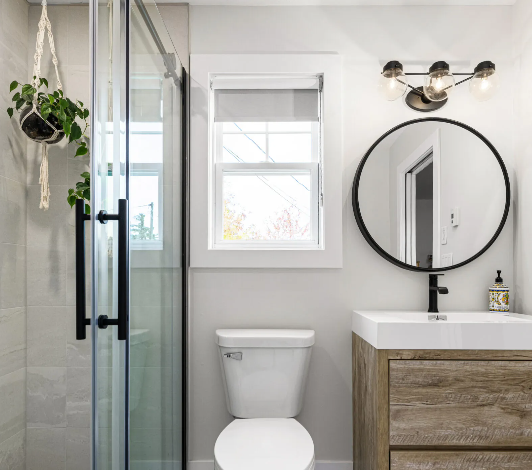
Choose materials with lifespan and maintenance in mind: porcelain tile for floors, acrylic or cultured marble for tubs, and solid-surface countertops for durability. Match waterproofing methods to substrate — membrane under tile, sealed substrates in wet zones — and confirm the contractor’s waterproofing brand and warranty.
Create a prioritized fixture list: toilet, shower valve, showerhead, tub, vanity, faucet(s), lighting, and exhaust fan. Specify exact models and finish options to avoid substitution. For lighting, plan layered illumination: task at mirror, ambient ceiling light, and waterproof shower lighting if required.
Use a simple checklist to finalize choices:
- Model, finish, SKU
- Lead time
- Return policy/warranty
- Installer notes (clearances, flange heights)
Approve finishes in writing and store receipts and serial numbers for warranty claims.